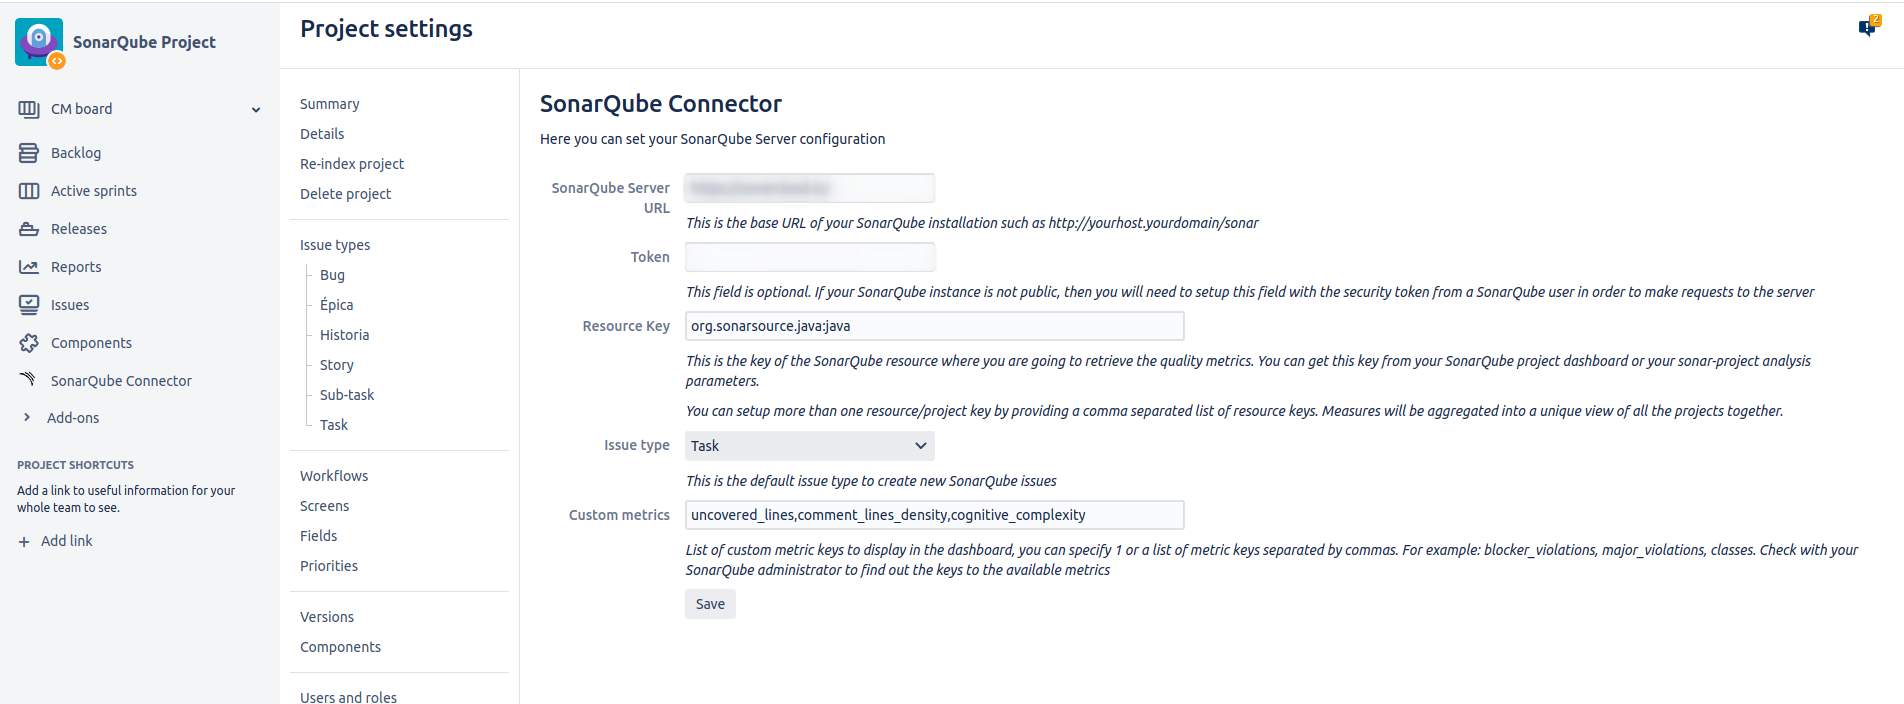
The plugin configuration is quite simple. You can setup your SonarQube settings in your JIRA project settings section:
There are three options:
- SonarQube Server URL: this is server base URL for your SonarQube installation
- Token: this field is optional. If your SonarQube instance is not public, then you will need to setup this field with the security token from a SonarQube user. You can find more information about SonarQube tokens here: https://docs.sonarqube.org/display/SONAR/User+Token
- Resource ID: this is the key of the SonarQube resource where you are going to retrieve the quality metrics. You can get this key from your SonarQube project dashboard or your sonar-project analysis parameters.
- Note: since version 1.4 you can setup more than one resource/project key by providing a comma separated list of resource keys. Measures will be aggregated into a unique view of all the projects together. See section linking multiple projects to Jira.
- Issue type: This is the default issue type to create new SonarQube issues
- Custom metrics: List of custom metric keys to display in the dashboard, you can specify 1 or a list of metric keys separated by commas. For example: blocker_violations, major_violations, classes. Check with your SonarQube administrator to find out the keys to the available metrics
If your SonarQube instance is using HTTPS then you may need to import your SSL certificate into your JIRA installation using keytool or any other similar tools.
Check this documentation if you don't know how to import your certificate into JIRA: https://confluence.atlassian.com/jira/connecting-to-ssl-services-117455.html