A Jira workflow is a set of statuses and transitions that an issue moves through during its lifecycle and typically represents processes within your organization.
excentia Admin Tools provides an additional set of workflow conditions, validators, and post-functions that let you do much more in your workflows.
- Choose
 >Issues
 - On the left hand side panel, click workflows.
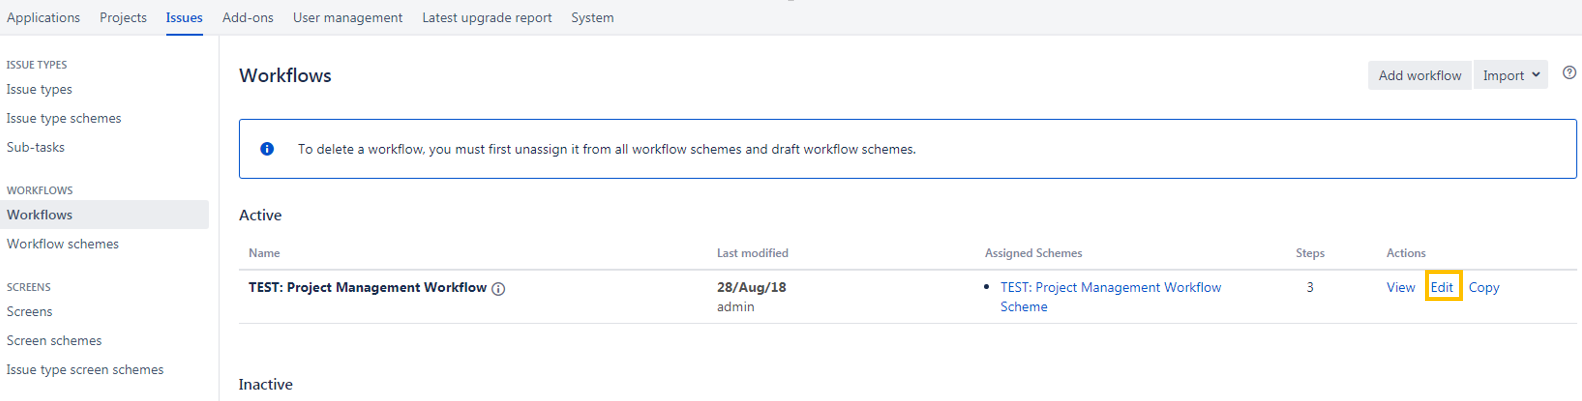
- You´ll find a list of workflows classified under 'active'
- You´ll find a list of workflows classified under 'active'
- Click 'Edit' under workflows actions
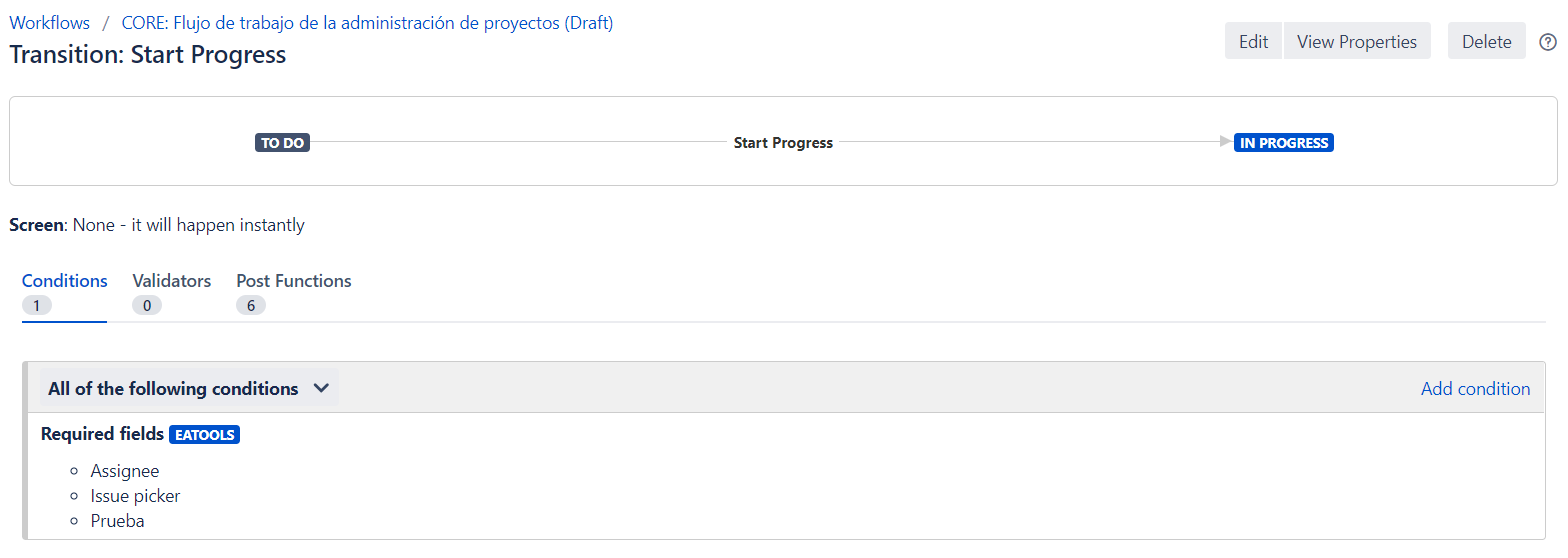
- Select the transition to which you want to add an additional condition, validator or post-function.
- Once in the transition configuration page, add conditions, validators or post-functions
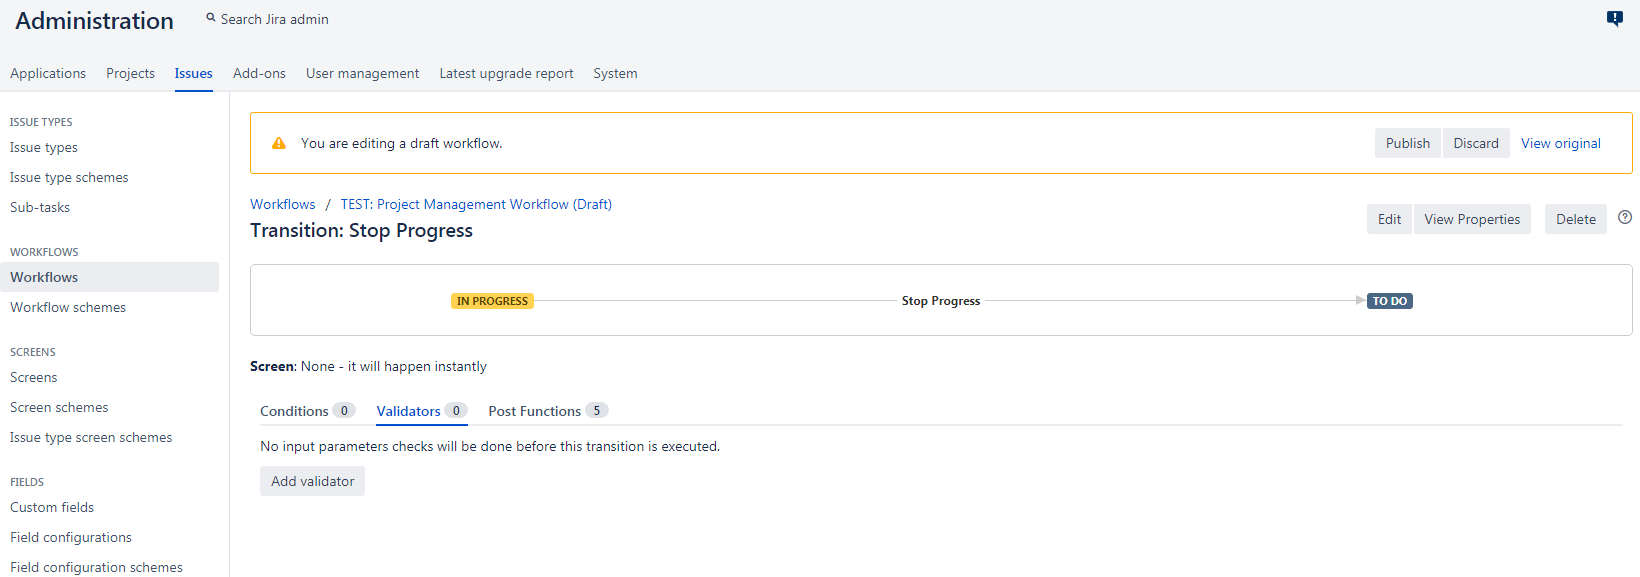
- Click the condition/validator/post-function you want to add from the possibilities shown.
Conditions
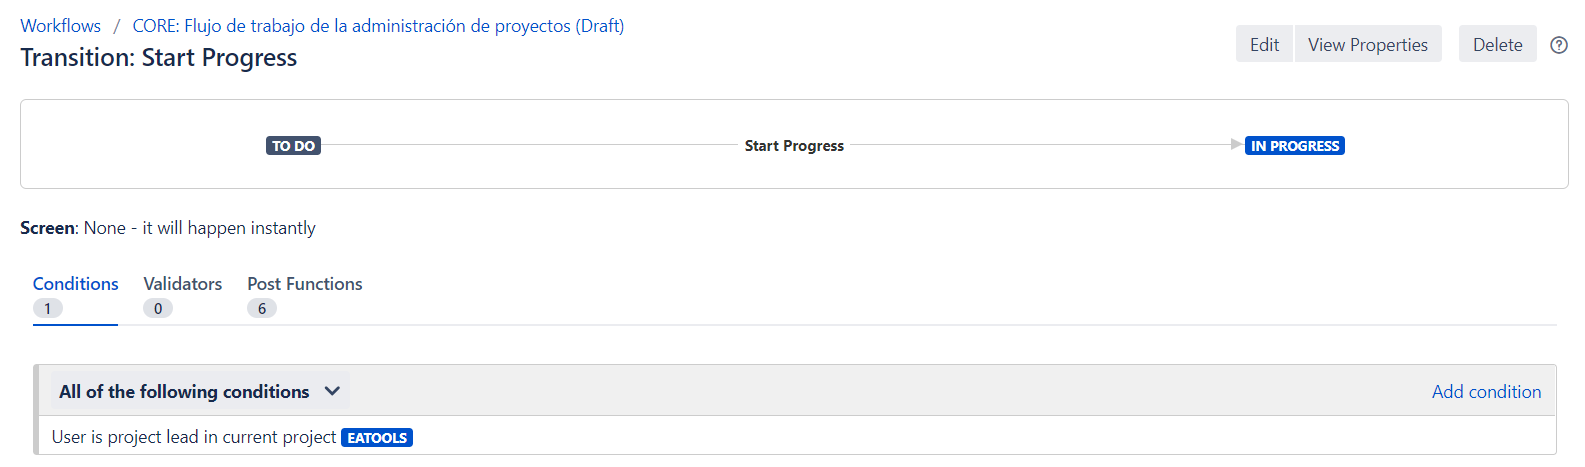
User is project lead
This condition has no parameter window. This means, that this transition will not appear unless the current user will be the project lead.
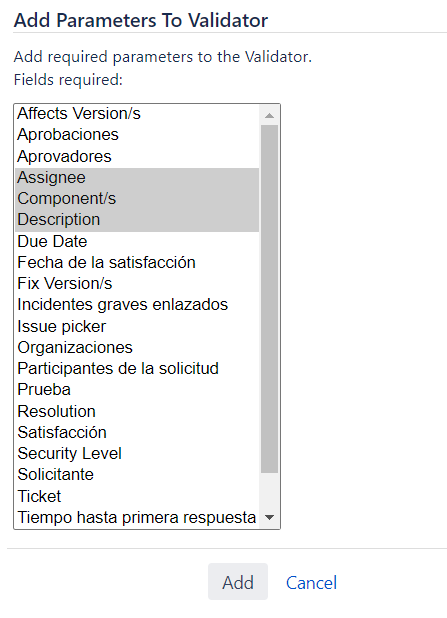
Fields required
One you select Fields required as a condition, it will appear this parameter window:
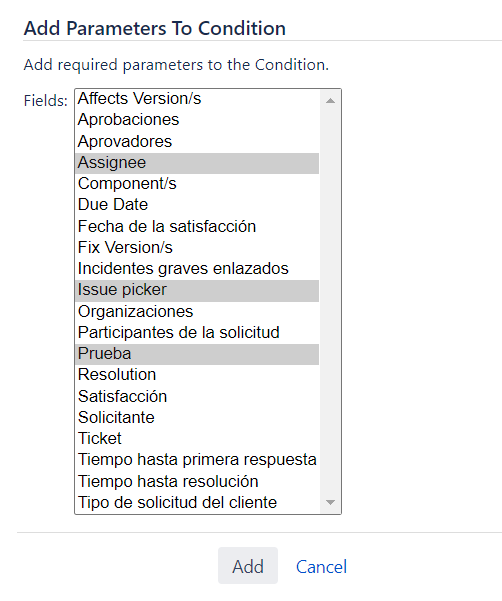
Then, you can select the fields you want (you can type ctrl. and select more than one) in order to check if they are already filled, to let someone see the transition.
This means, that this transition will not appear unless all the fields will be already filled up.
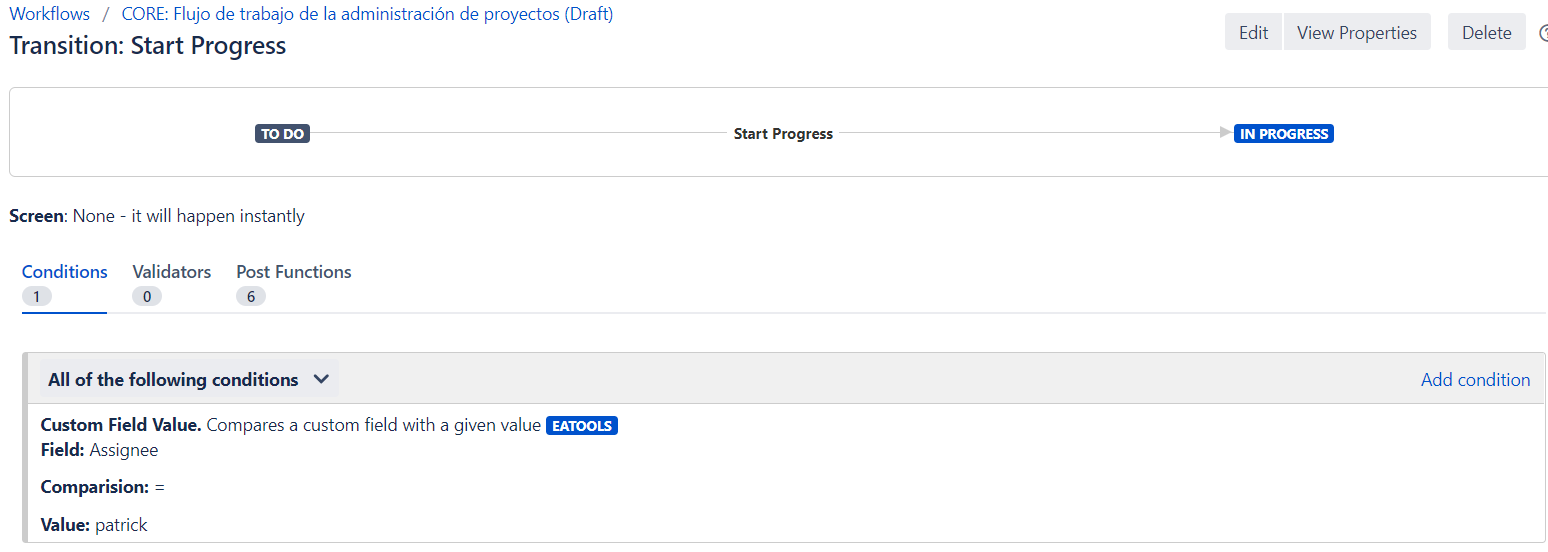
Custom field value
One you select Custom field value as a condition, it will appear this parameter window:
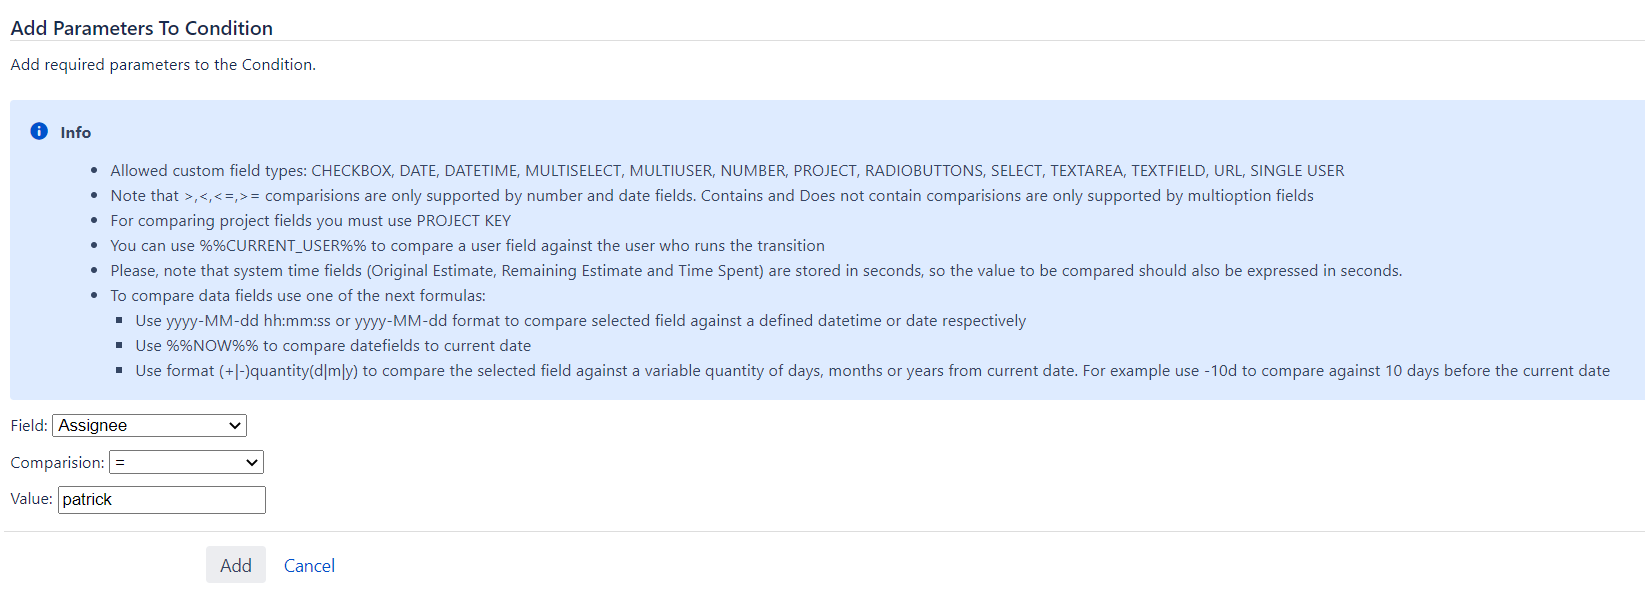
Then, you can select the field, the comparison type, and the value, in order to check if they are already filled with the value configurated, to let someone see the transition.
This means, that this transition will not appear unless the field assignee will be filled with patrick.
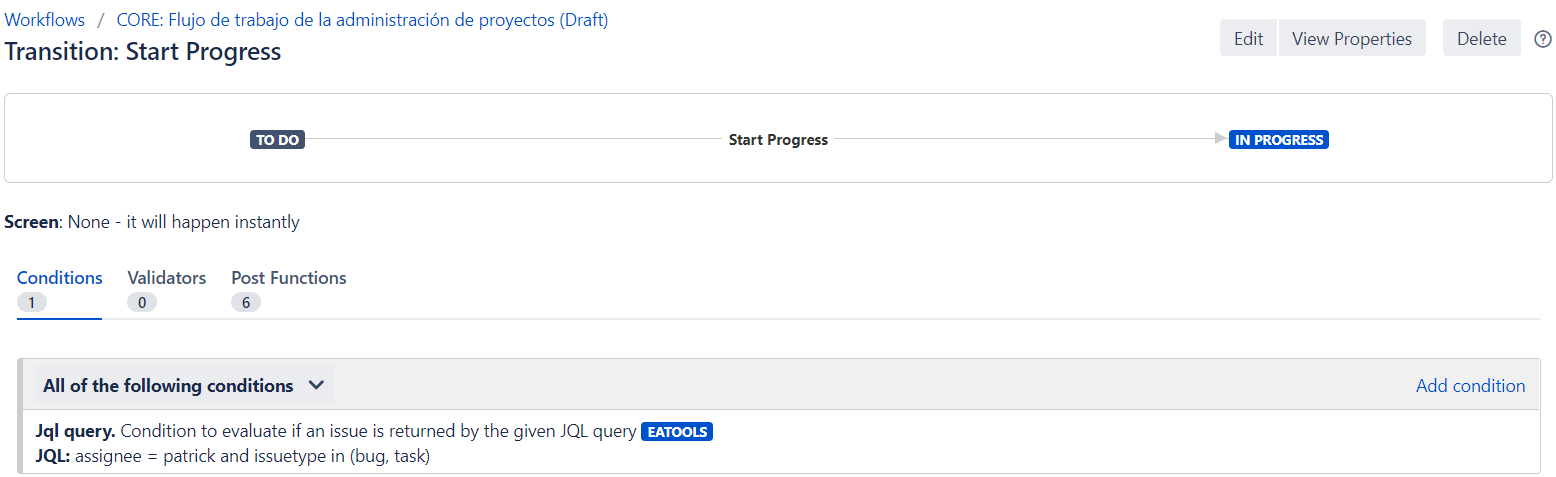
JQL condition
One you select JQL query as a condition, it will appear this parameter window:
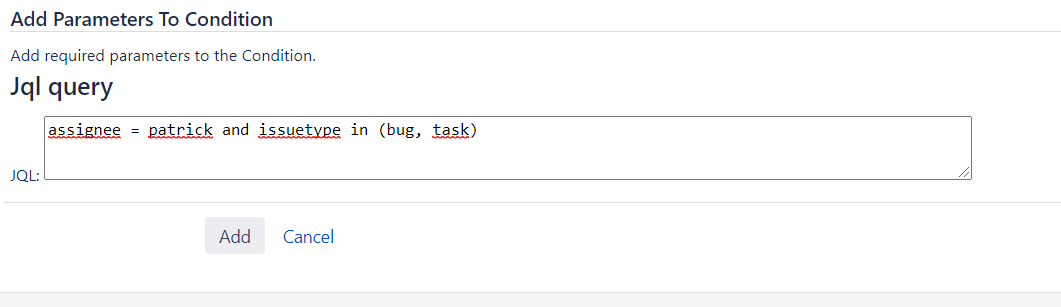
Then, you can set the JQL query that must be fulfilled to let someone see the transition.
This means, that this transition will not appear unless the field assignee will be field with patrick and the issuetype will be or bug or task.
Validators
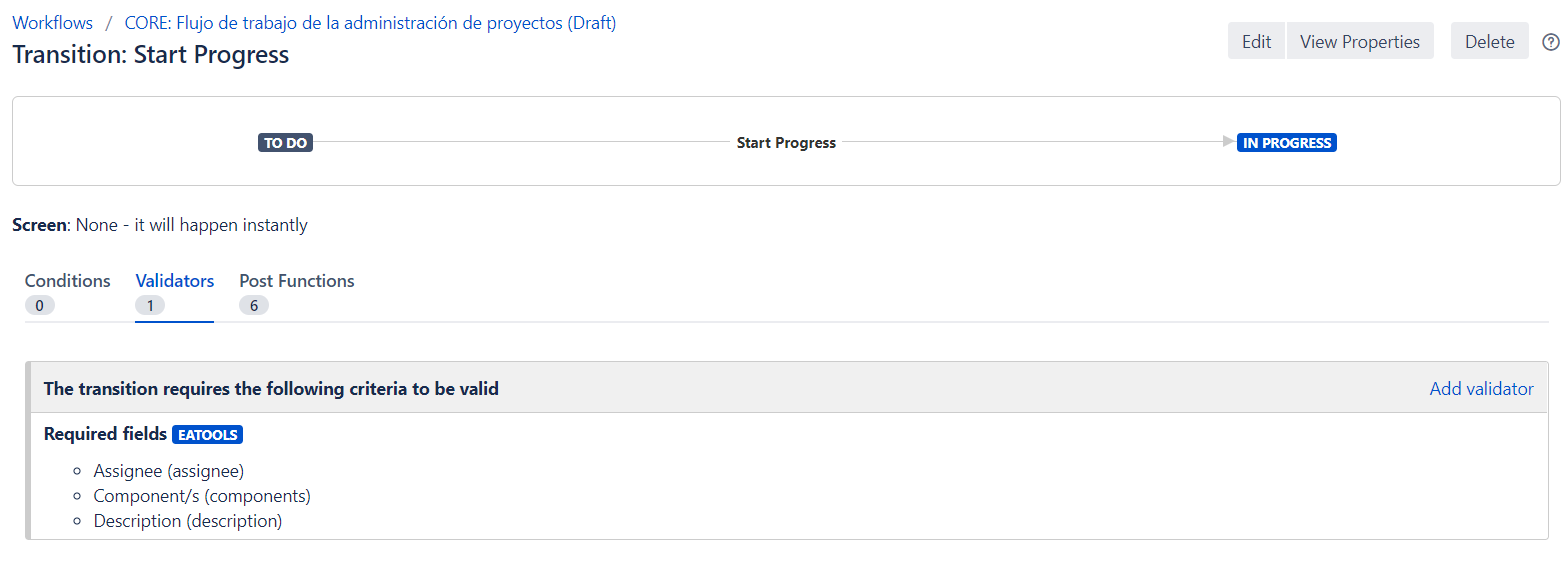
Fields required
One you select Fields required as a validator, it will appear this parameter window:
Then, you can select the fields you want (you can type ctrl. and select more than one) in order to check if they are already filled, to allow run the transition.
This means, that this transition will not run, unless the fields assignee, component/s and description will be filled up.
This transition should be accompanied by a transition screen with the required fields.
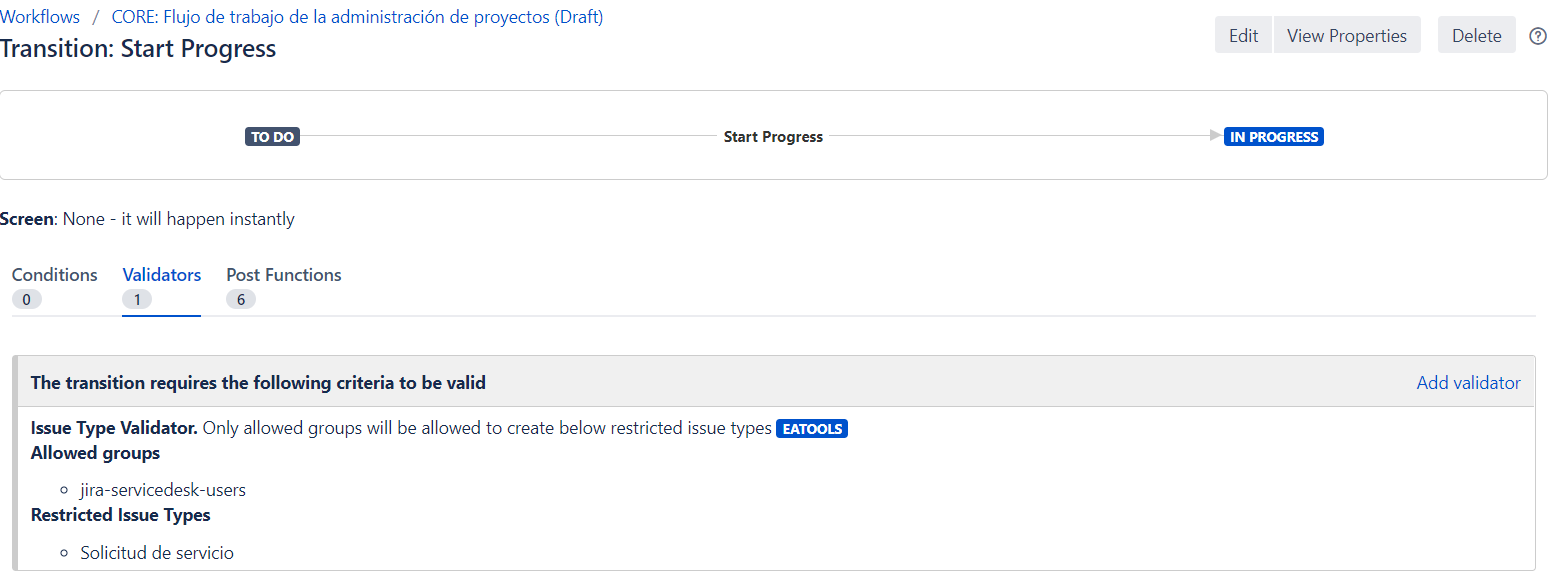
Restrict issue type on creation
One you select Restrict issue type on creation as a validator, it will appear this parameter window:
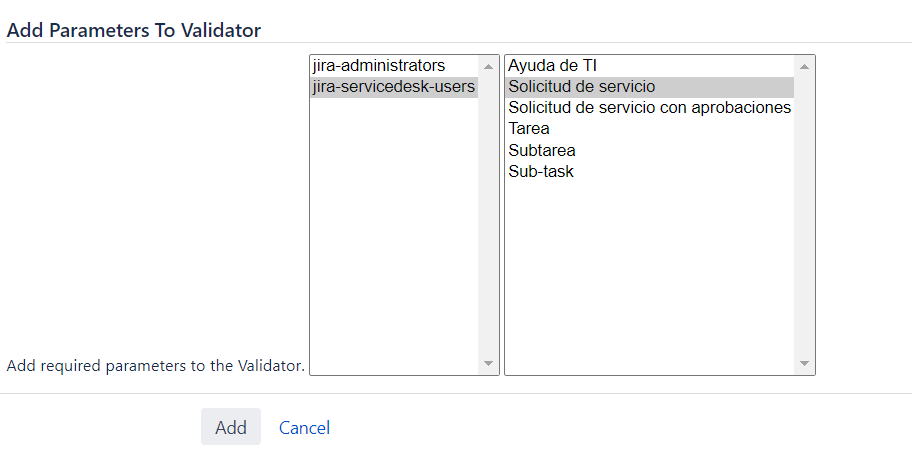
This just makes sense on creation transition. On it, you select on the first column the available groups, and on the second column the available issue types.
This means, that this transition will just allow the issue creation of the issue type "Solicitud de servicio" by "jira-servicedesk-users" group.
Comment required
This validator has no parameter window. This means, that this transition will not run, unless there is a comment filled up.
This transition should be accompanied by a transition screen.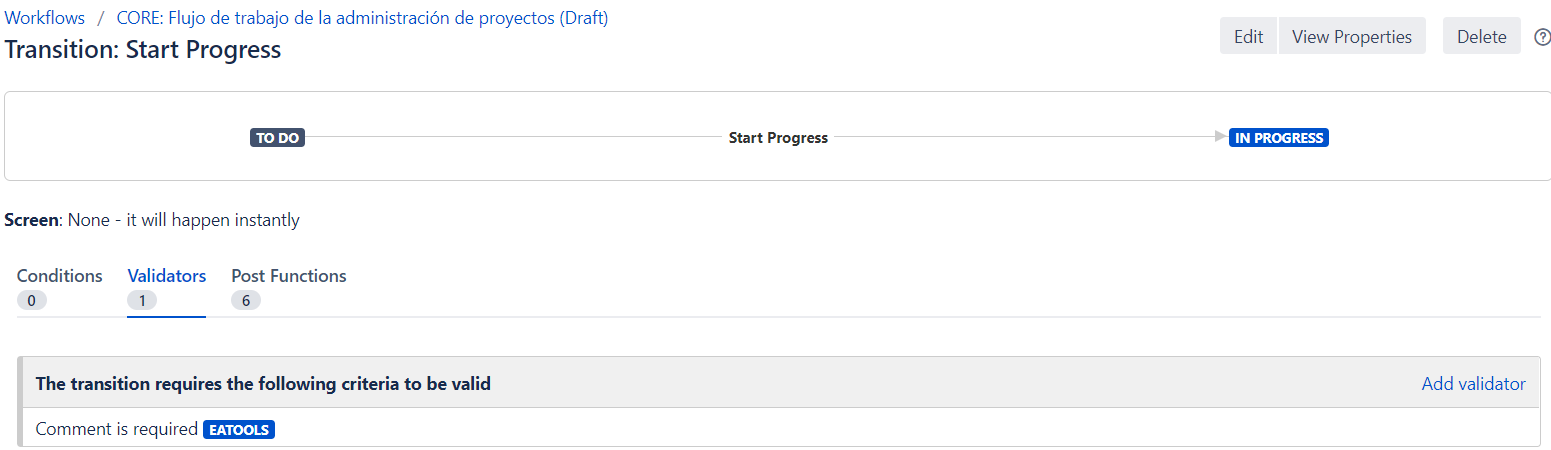
System time field
One you select System time field as a validator, it will appear this parameter window:
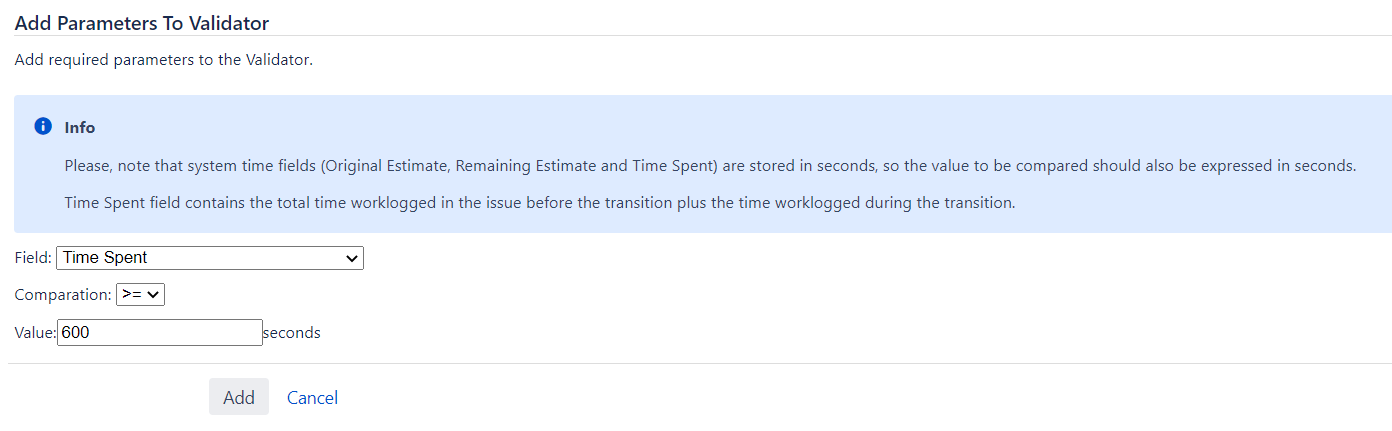
This makes sense on resolution transitions, where you want to assure that issues has worklogs filled up. On it, you select a system time field, the comparison type, and the value (in seconds).
This means, that this transition will just allow the transition if the issue has worklogs greater than 10 minutes.

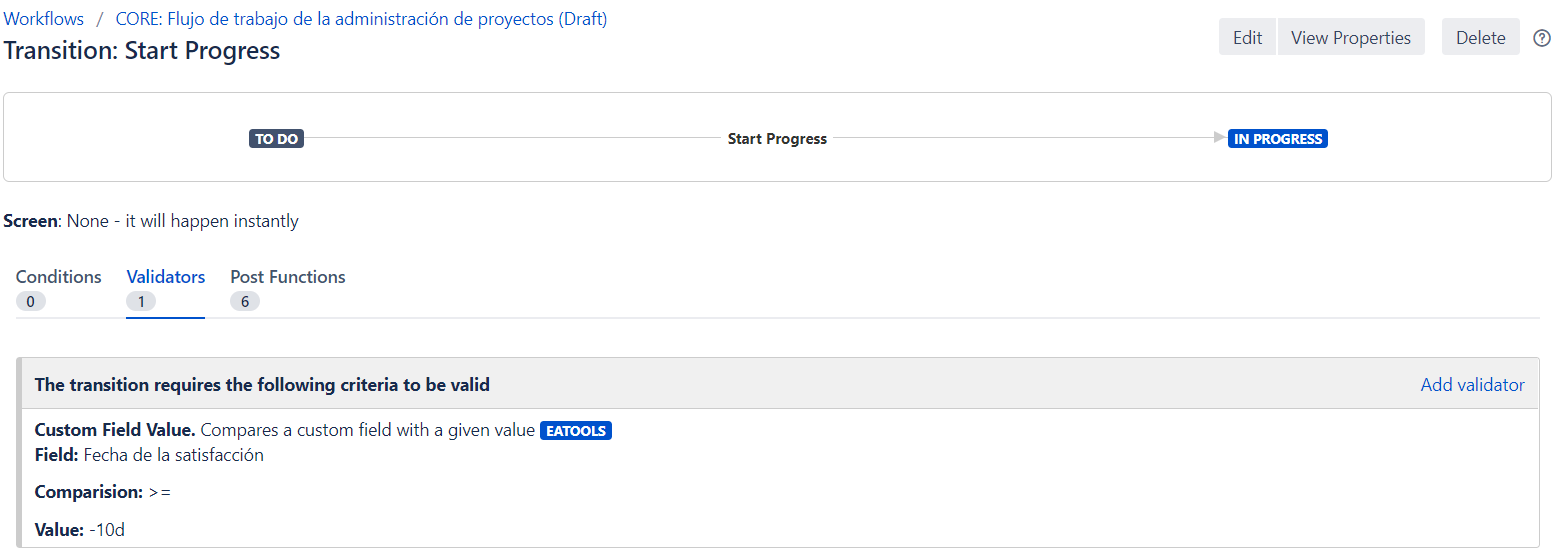
Custom field value
One you select Custom field value as a validator, it will appear this parameter window:
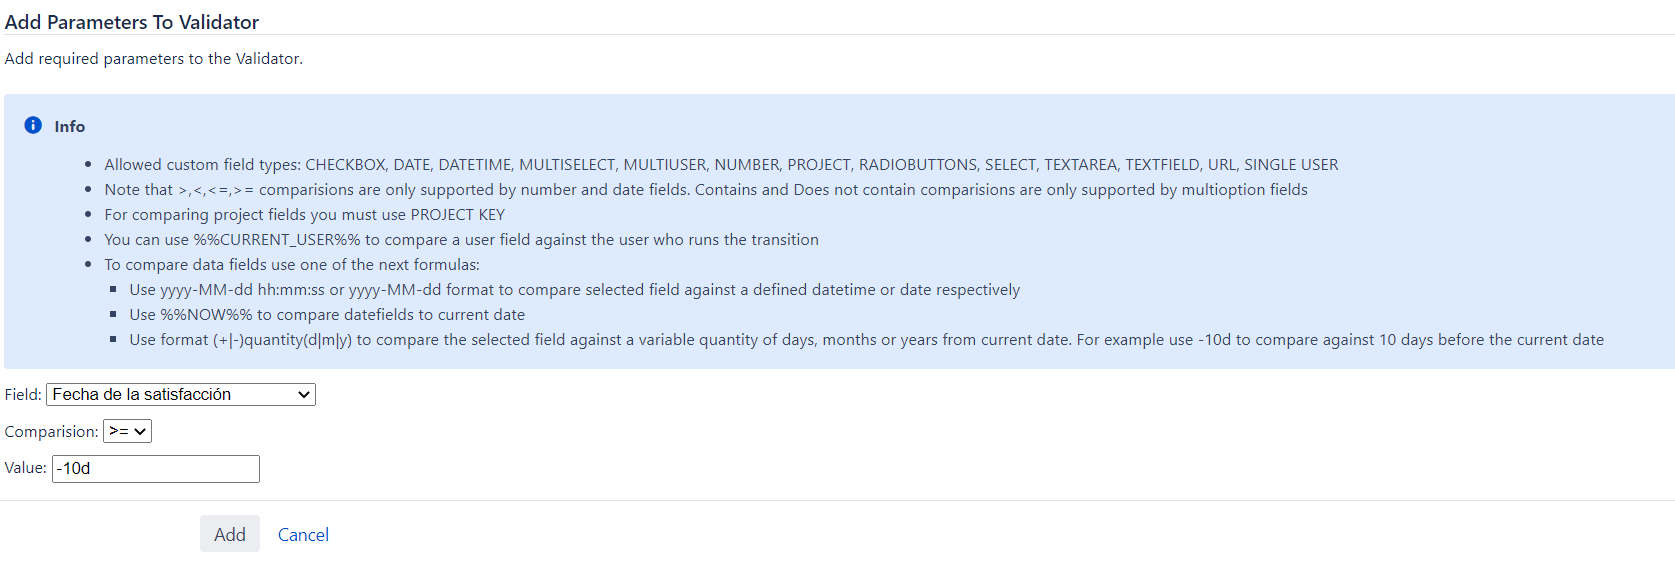
Then, you can select the field, the comparison type, and the value, in order to check if they are already filled with the value configurated, to run the transition.
This means, that this transition will not run unless the field "Fecha de la satisfacción" will be filled with a date before than 10 days ago.
Postfunctions
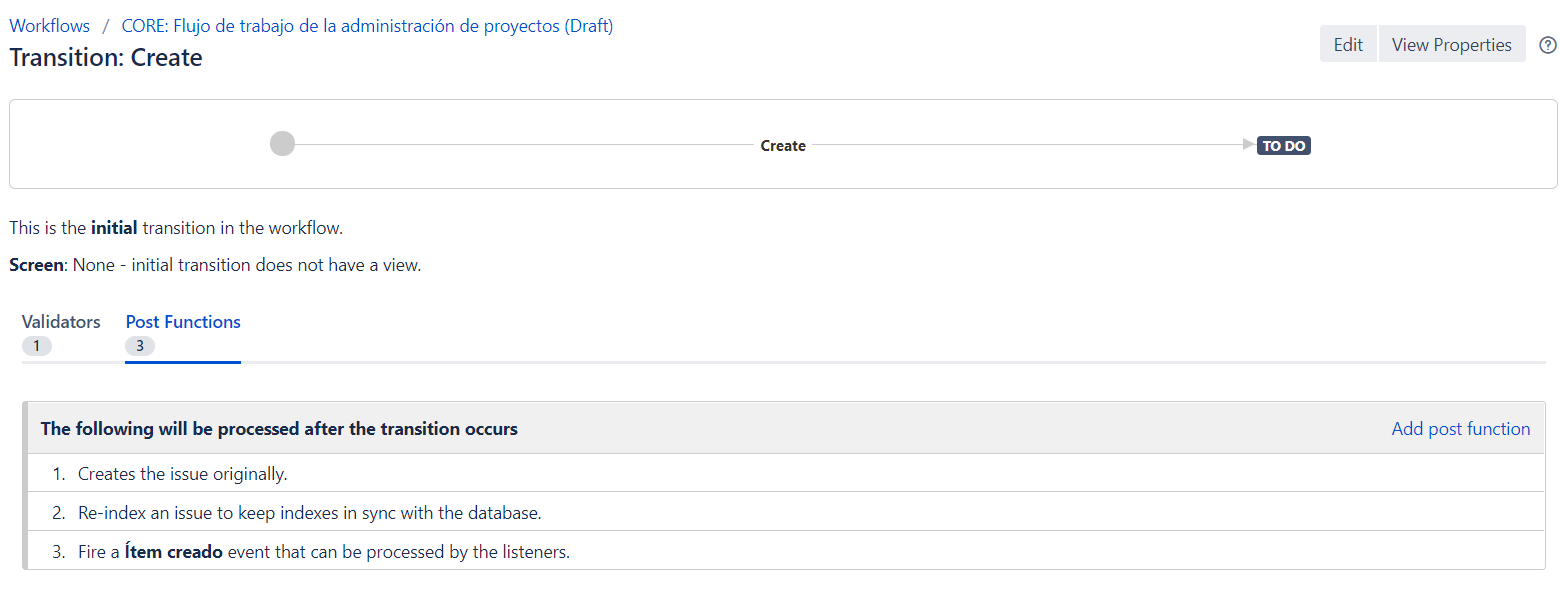
With postfunctions we need to take care about the order of the actions, because it may affects. Aditionally, in the creation of the issue, be carefull because you need to set the postfunction always after the 3 default postfunctions:
- Creates the issue orginally.
- Re-index an issue to keep indexes in sync with the database.
- Fire a issue created event that can be processed by listeners.
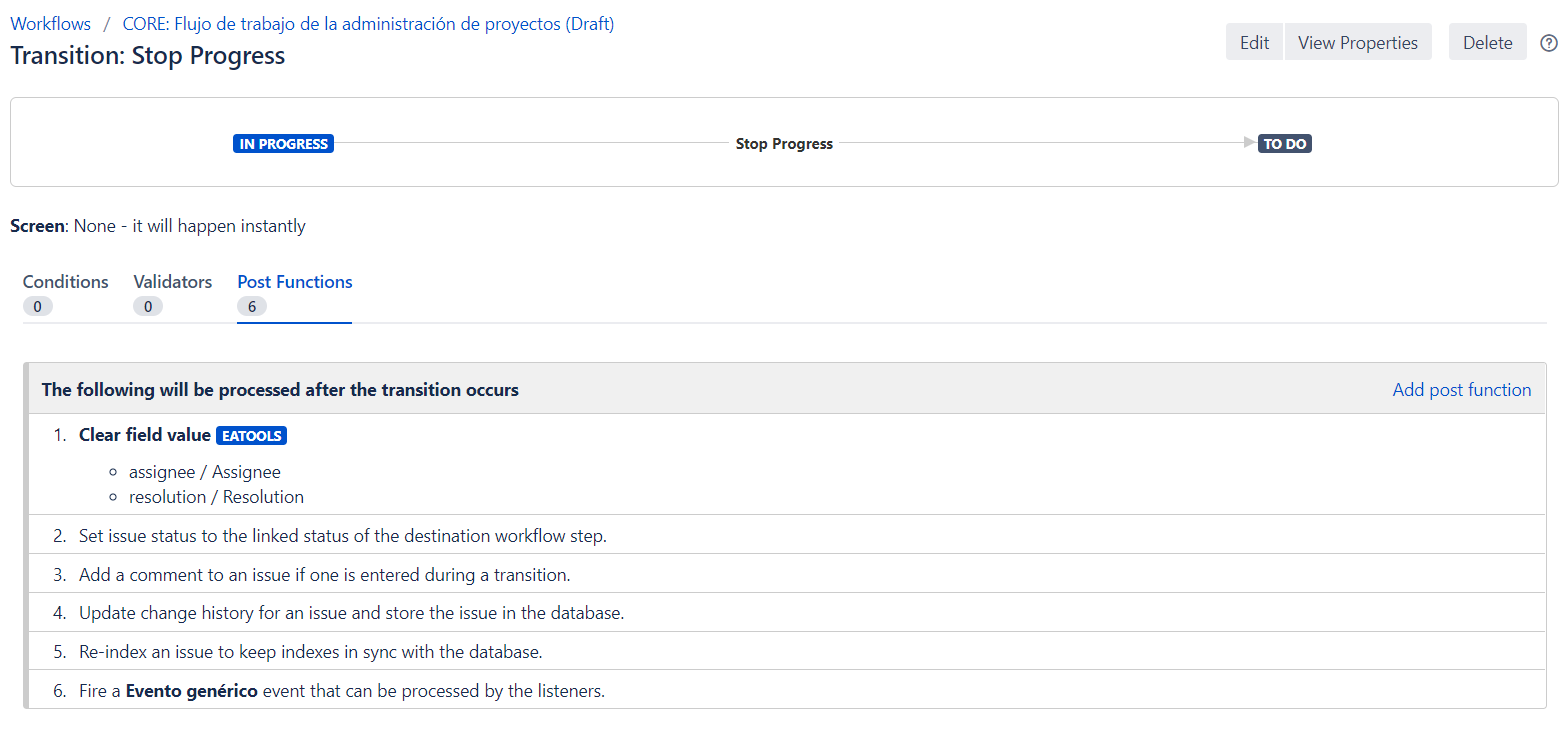
Clear fields
One you select Clear fields as a postfunction, it will appear this parameter window:
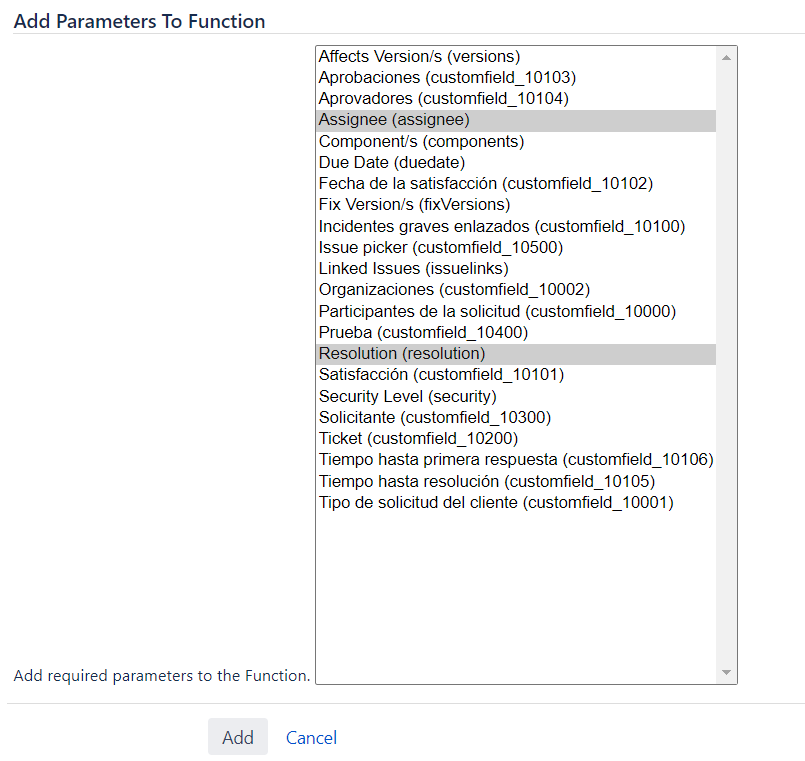
Then, you can select the fields you want (you can type ctrl. and select more than one) in order to allow the function delete the value of those fields.
This means, that this transition will delete the value of the fields "assignee" and "resolution. It would make sense when an issue is reopened.
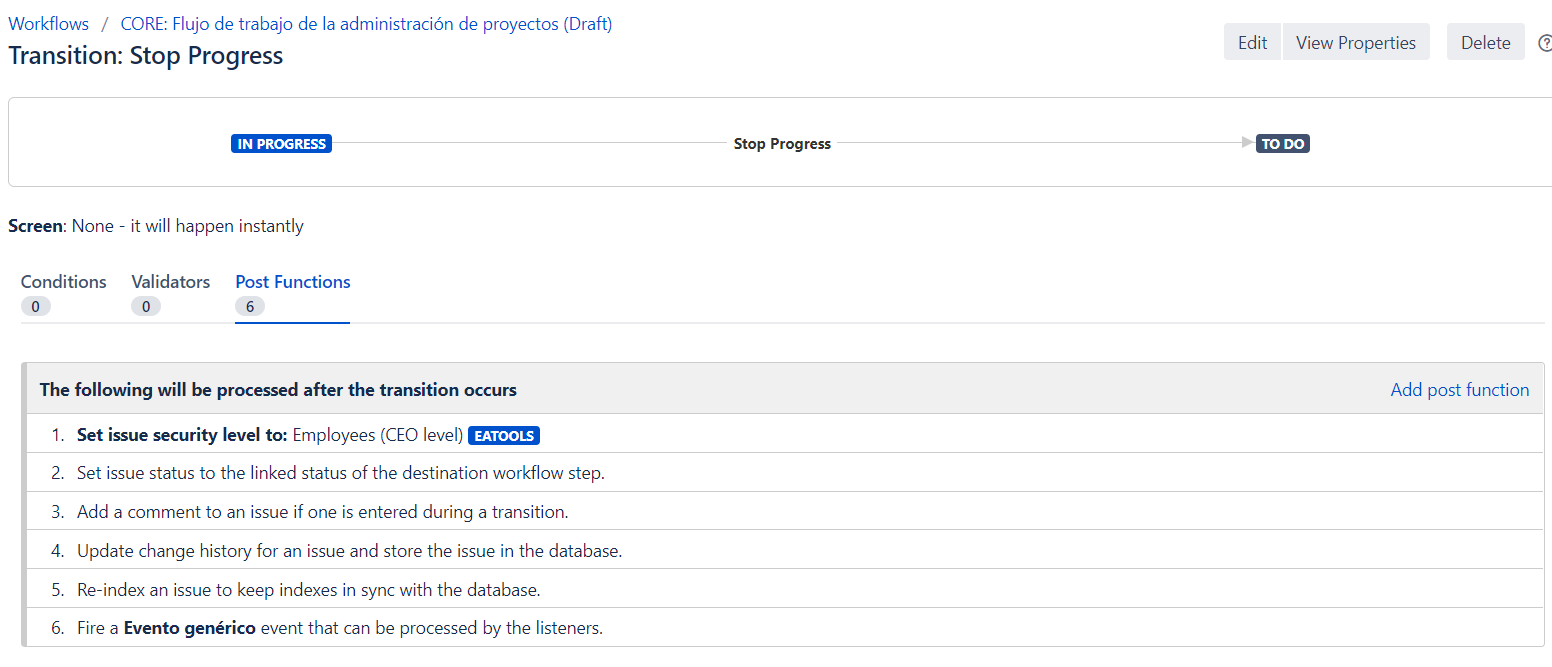
Change Security Level
It just make sense if the project has security levels
One you select Change Security Level as a postfunction, it will appear this parameter window:
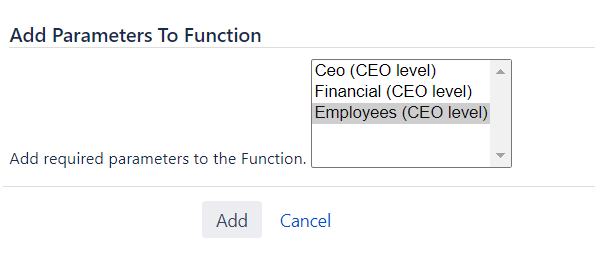
Then, you can select the security levels in order change the security level on the transition.
This means, that this transition will change the value of the security level. It would make sense when you want to allow more users to see a specific issue.
Copy transition comment in linked issues
One you select Copy transition comment in linked issues as a postfunction, it will appear this parameter window:
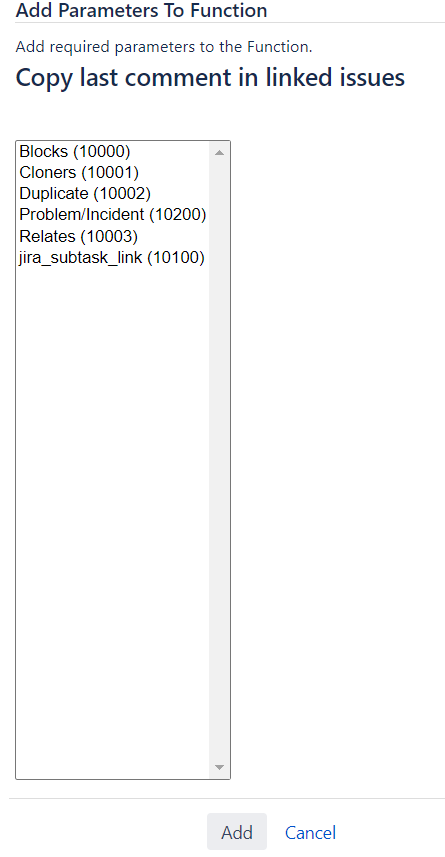
Then you can select the linked types you want (you can type ctrl. and select more than one) in order to allow the function copy the comments.
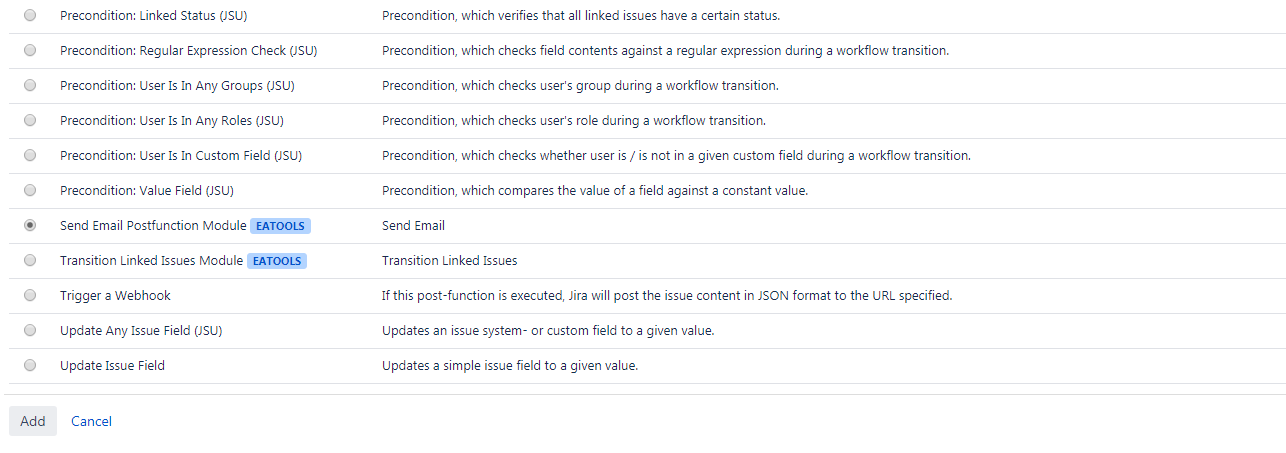
Send custom email post-function
This particular post-function has various customization options. Following, an explanation of it:
- Having been followed previous steps, you should encounter a list of available post-functions. Select "Send Email Postfunction Module and click 'Add' button.
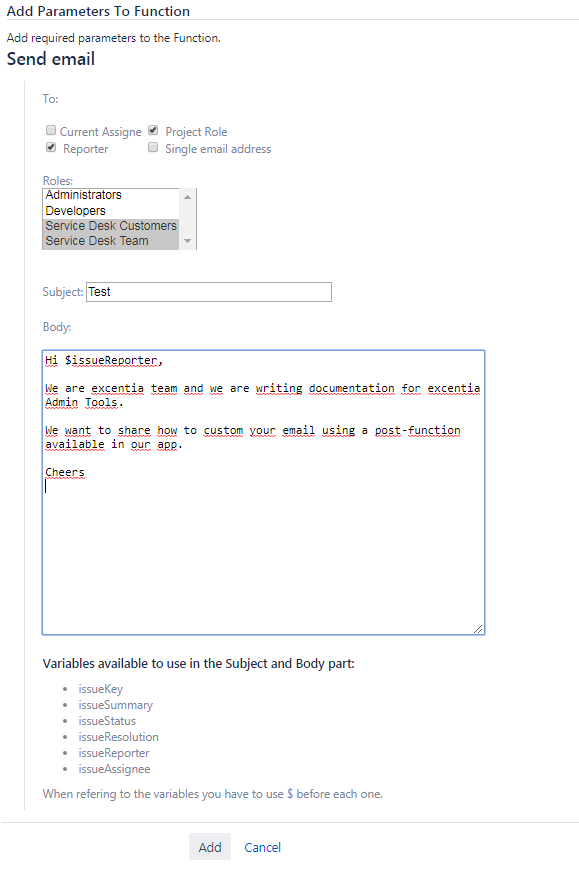
2. A customization page will appear. You'll be able to configure recipients, email subject and write the email.
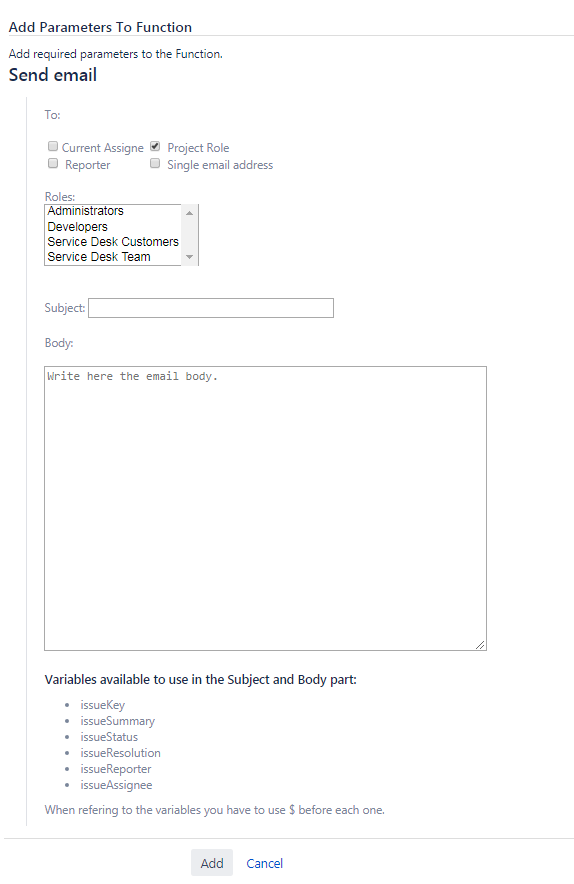
3. Email can be sent to:
- Current Assigne
- Project Role: roles available on the project will appear. Press Ctrl and select as much roles as you need to send the email to.
- Reporter
- Single email address: manually introduce one email address or various email addresses separated by a coma.
Variables introduce information contained in Jira fields. To use variables available, just add the symbol $ before the variable name. You can use these variables on the subject and body.
If you want to know more about workflow management, check Atlassian Documentation.